Virtual Camera Setup
This section will demonstrate how to map video input sources to CONNECTi devices, and enable the stream & preview windows for sharing in UC platforms. In the example below we are using Zoom, but the same concept applies to any UC platform.
Source Mapping
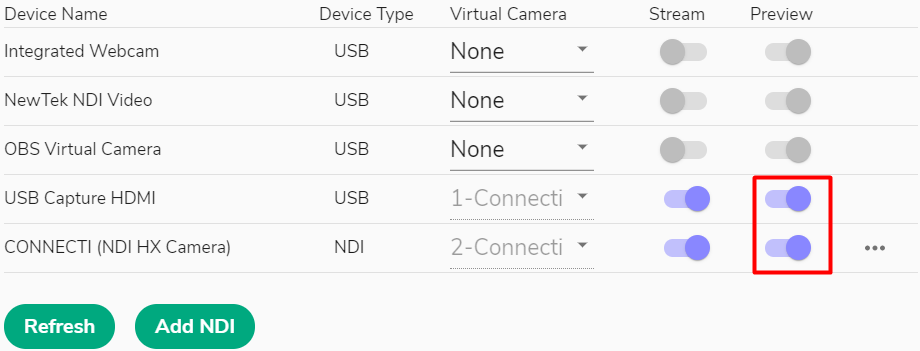
In the below example we have several video sources, including an integrated webcam, HDMI-to-USB capture device connected to the PC and an NDI HX Camera source on the network.
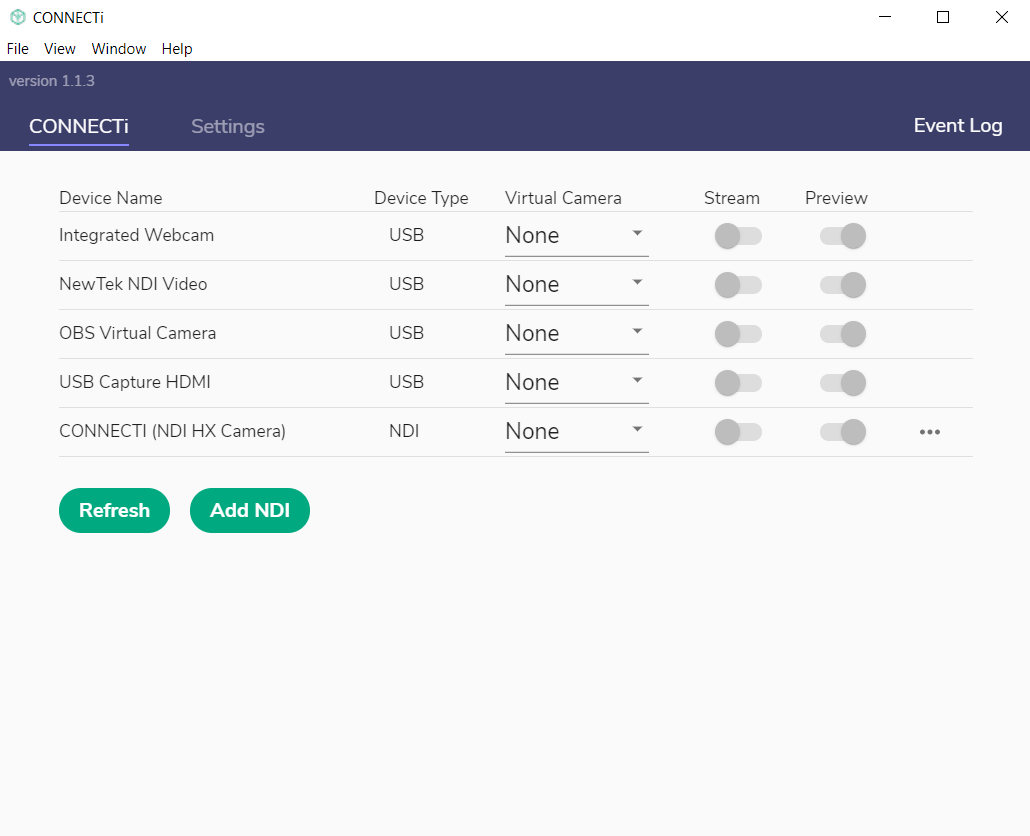
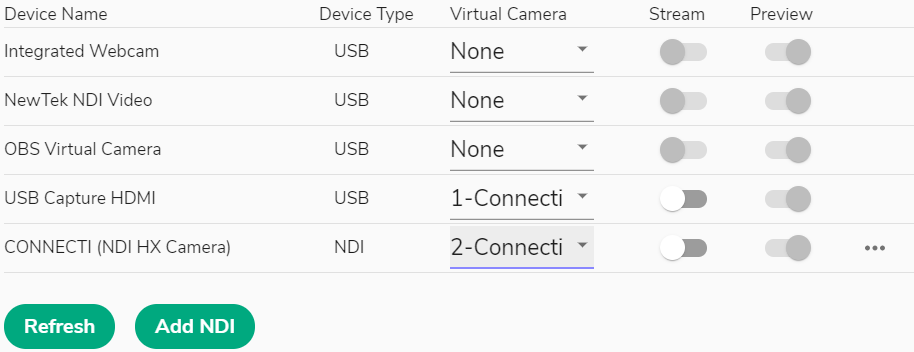
Under the 'Virtual Camera' section, select a 'CONNECTi' virtual device for each video source. You can only map one source to one CONNECTi virtual device. Take note of the virtual camera names for each mapped video source. (eg. USB Capture HDMI is assigned to 1-CONNECTi)
Enable Streaming
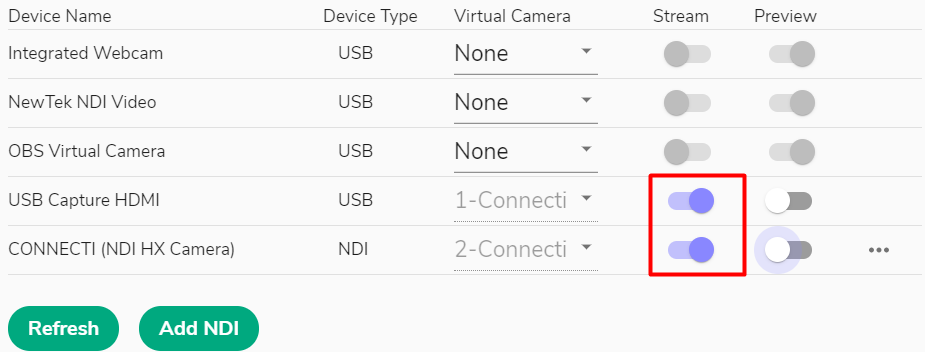
Once the video sources are mapped to CONNECTi virtual devices, enable the toggle switch under 'Stream' for each device to activate the source device stream in the mapped CONNECTi virtual camera. You will now be able to select this as a camera source in your UC platform.
Enable Preview Window
To show a connected video source through screen sharing, enable the toggle under 'Preview'.
This will open a window on your desktop with the video source displayed and can be selected as a desktop window through screenshare. You will see the open preview windows on your taskbar once enabled.

Enable CONNECTi in UC
Once the video sources are mapped to CONNECTi virtual Cameras and you have opened your preview windows, launch the UC application and select the desired CONNECTi Virtual Camera to display. In this example we are using Zoom and have selected 2-CONNECTi as our Camera. The same method applies to all UC platforms (eg. MS Teams, Cisco Webex etc.)

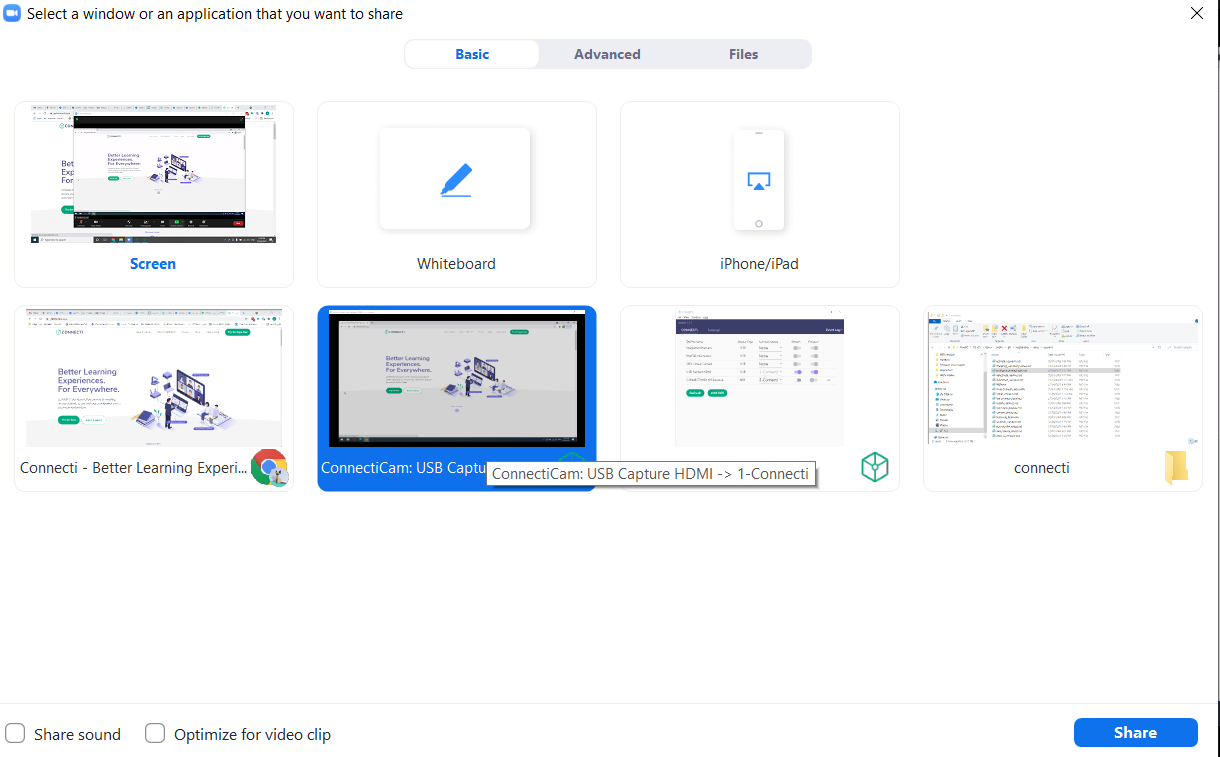
Share preview window in UC
To share an enabled preview window in your UC application, select 'Share Screen'.

Select the screen you want to share. You will see the preview windows as sharable windows as a desktop application.